From time to time we have to go into the deep depths of the ZMI to do some inspections or even manual changes.
We had a little incident, where some manual changes were accidentally done on the wrong system. Note, that we have multiple systems (dev, staging, test, training) that are hard to differentiate on the casual glance. Which especially is true, when tunneling to some frontends via ssh -L 5000:localhost:8080 user@my-plone-system and just browsing in the ever same looking ZMI.
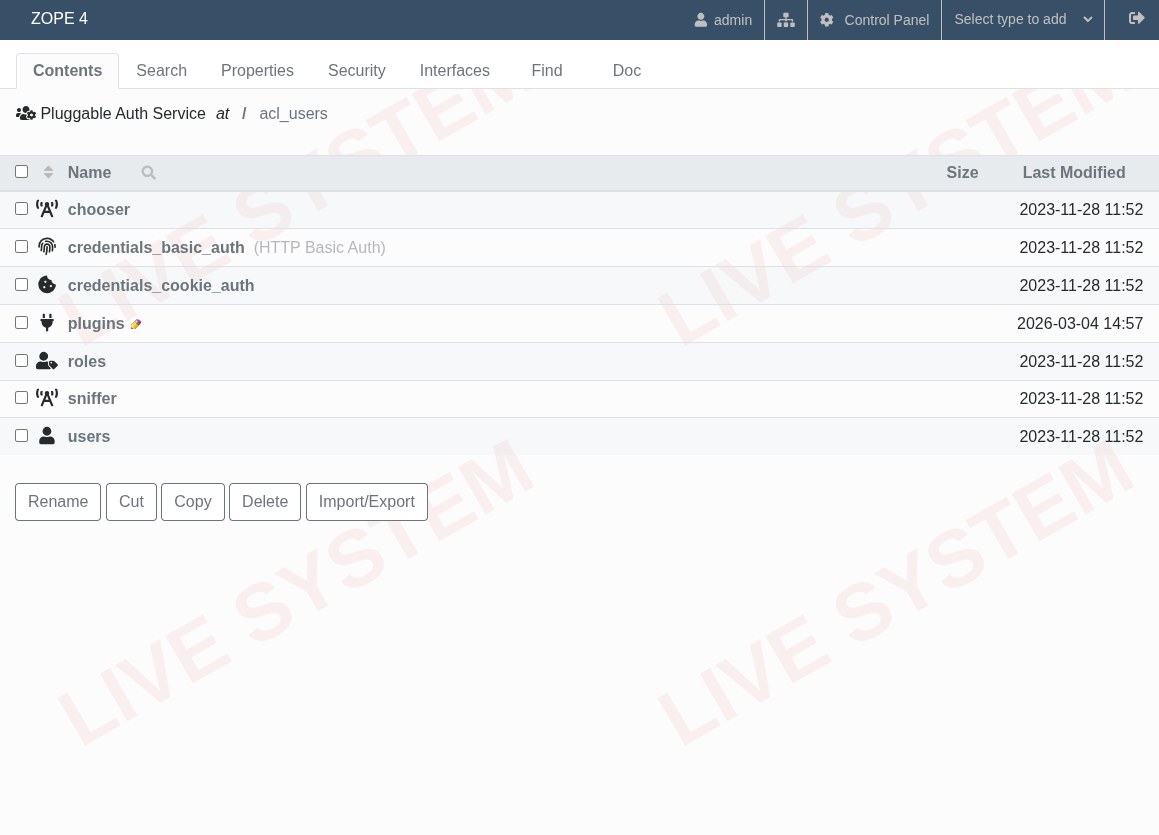
I present here a small helper in case someone has faced similar issues. We do this by making the ZMI visually slightly different. And the best thing, it’s all TTW (through-the-web). Yay! ![]()
The result looks like this:
Steps to achieve this:
- Go to Zope Site Root ZMI → Select “type to add” and choose File
- Enter for
idthe filenamecustom_style.css. Click “Add” button. - Edit the file again with with this contents:
custom_style.css
body {
  background-image: url("data:image/svg+xml;utf8,\
<svg xmlns='http://www.w3.org/2000/svg' width='600' height='400'>\
<text x='50%' y='50%' dominant-baseline='middle' text-anchor='middle' \
font-family='Arial, Helvetica, sans-serif' font-size='80' font-weight='bold' \
fill='rgba(200,0,0,0.05)' transform='rotate(-30 300 200)'>\
LIVE SYSTEM\
</text>\
</svg>");

  background-repeat: repeat;
}
- Go to Zope Site Root ZMI → Properties
- Add new property
zmi_additional_css_pathswith type “lines”. Click “Add” button. - Enter
custom_style.cssin the new textarea and Click “Save changes” button.
Done. You may of course change the styles to your liking.